Scroll below for instructions ↓
Section 1
Preparing
The Foundation
Marking & Clearing
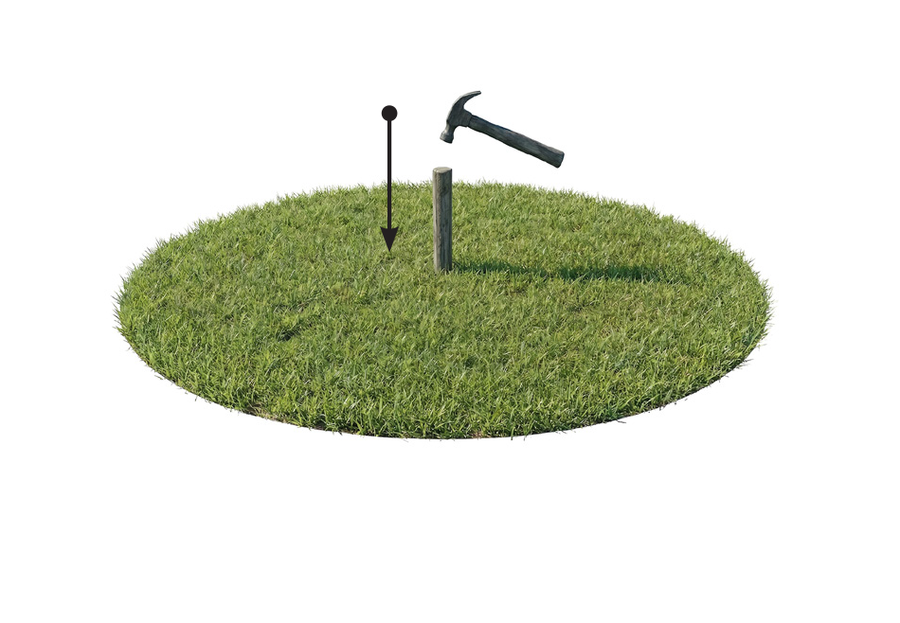
1. The Circle
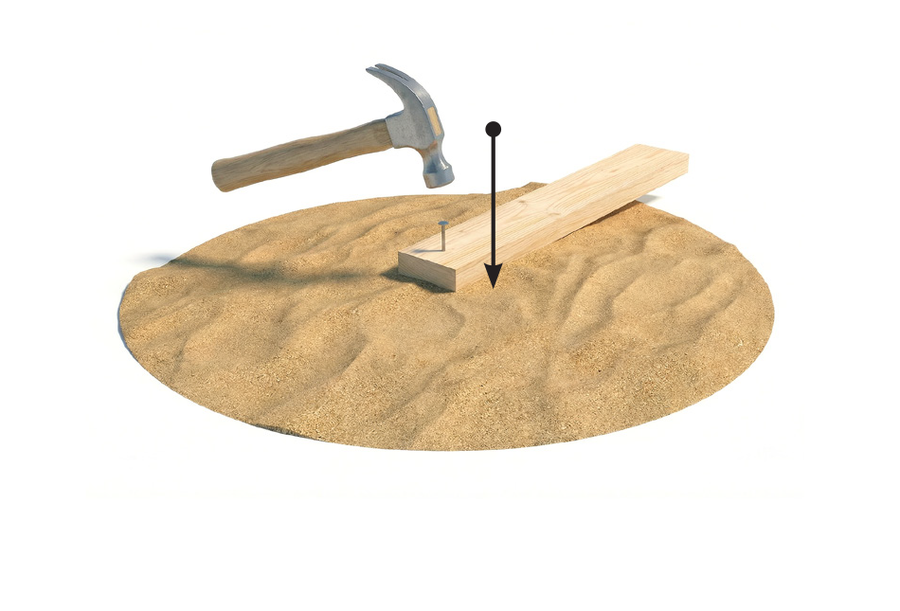
Drive a center peg to mark the pool's center point.
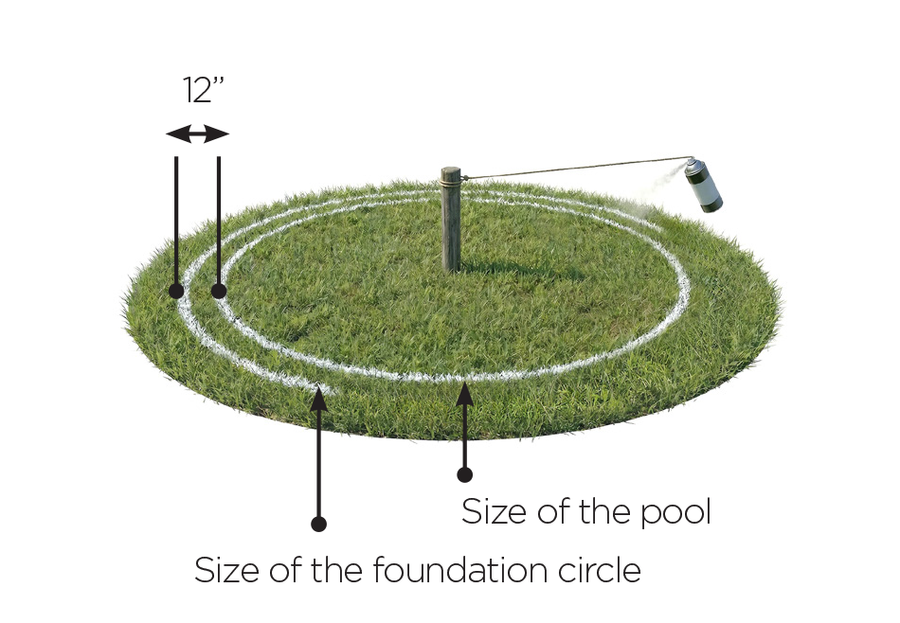
2. Marking
Mark a circle 12 in (30 cm) larger than the pool diameter.
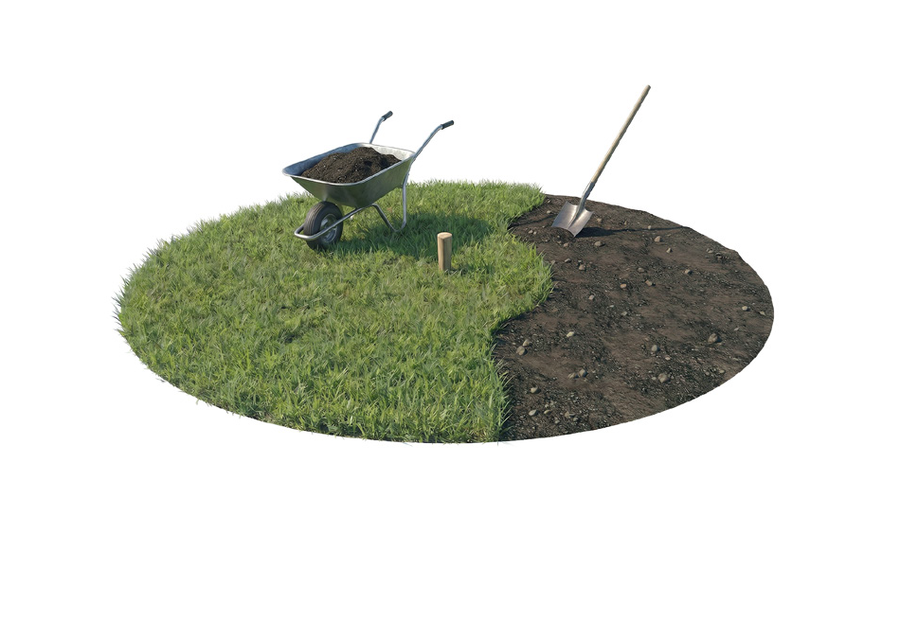
3. Sod
Remove all sod and plants from the marked area. Compact the ground thoroughly.
Precision Leveling
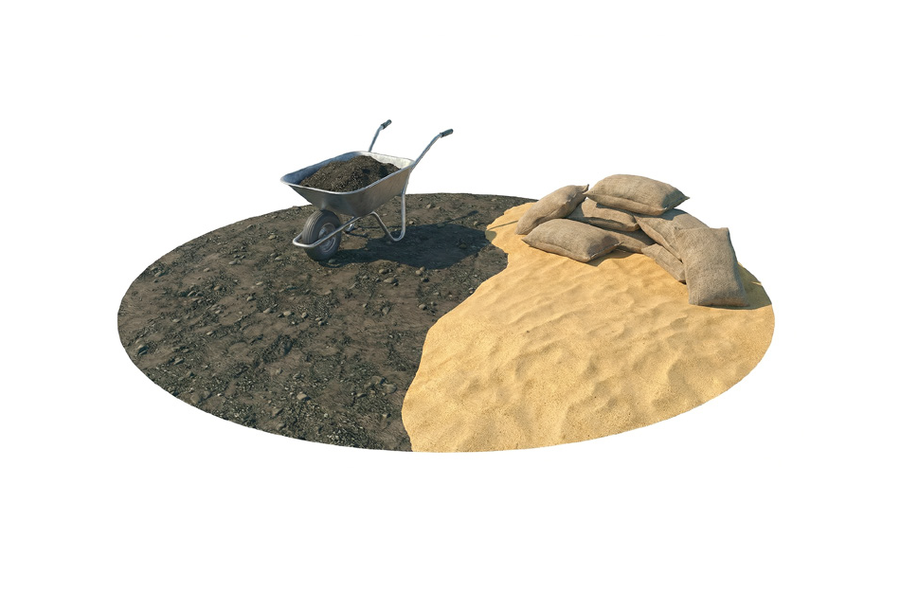
4. Base Sand Layer
Add a 2 to 3 in layer of fine, debris-free sand across the entire pool base.
5. Method
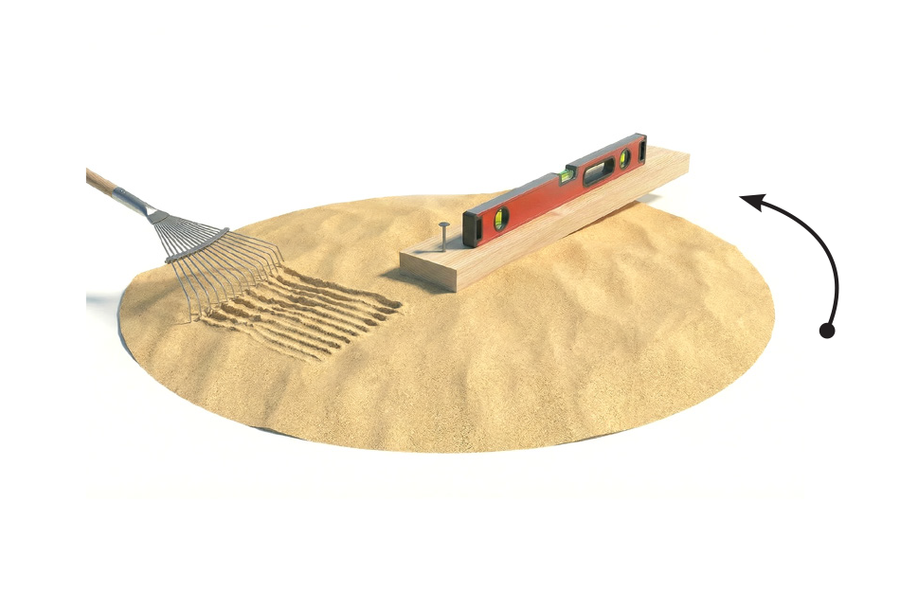
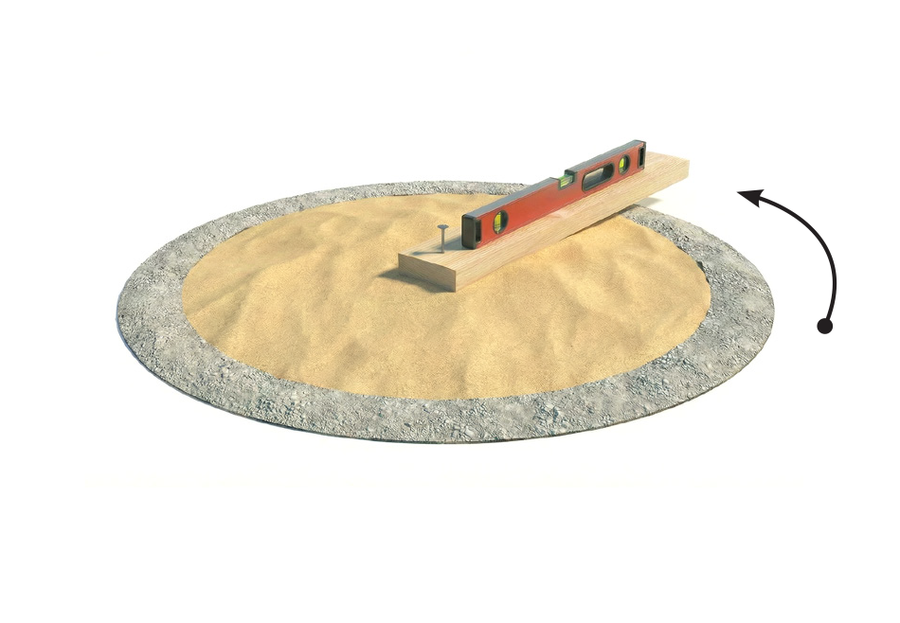
Nail a straight 2x4 wood plank to a flush center stake.
6. Level
Rotate the plank with a carpenter's level. Remove high spots using a shovel or rake.
Perimeter Preparation
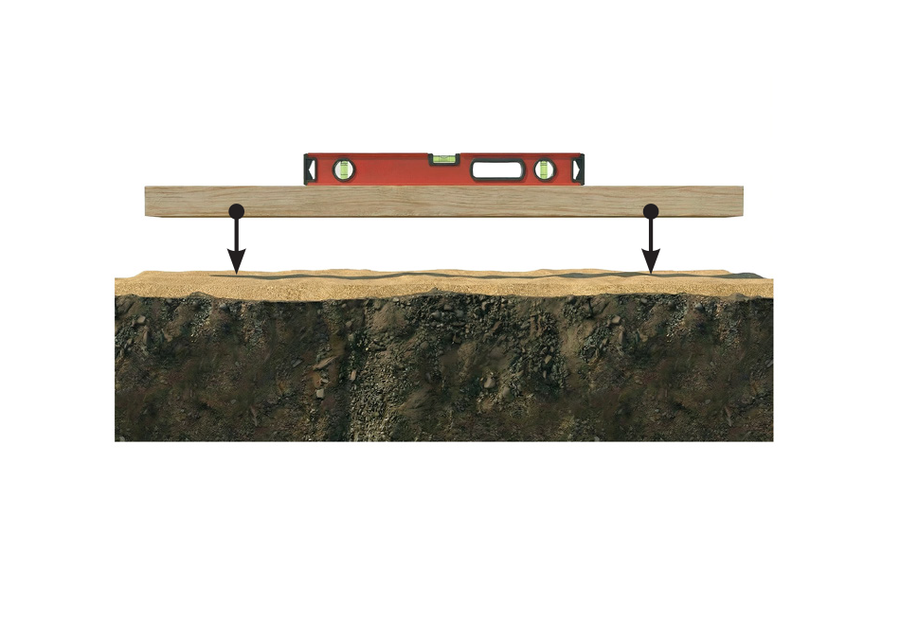
7. Diameter Level
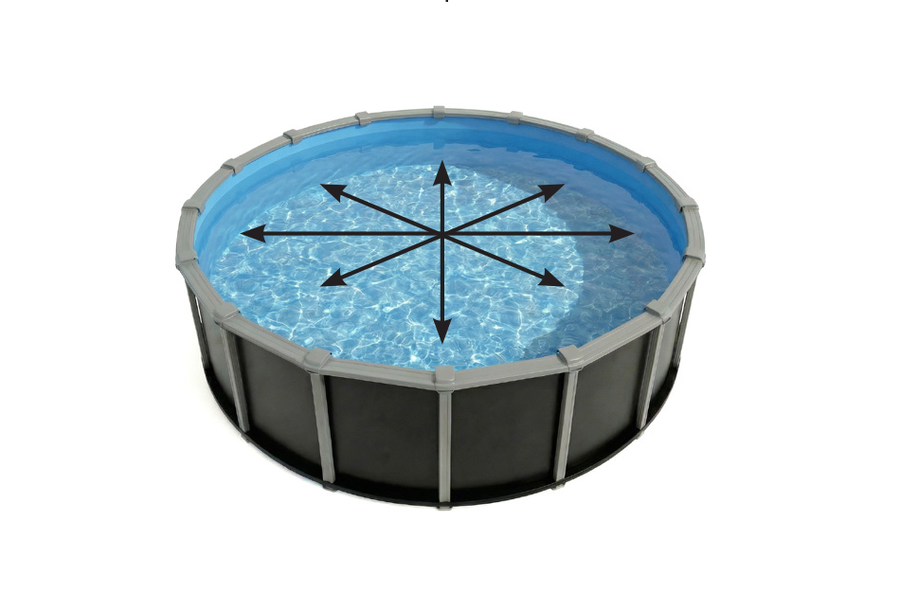
Ensure the pool area is level across the entire diameter.
8. Base Material
Spread rock dust or fine mortar around the rim (24 in wide, 2 in thick).
9. Flat Zone
The outer 24 in (60 cm) must be perfectly flat for the wall to rest.
Final Foundation Check
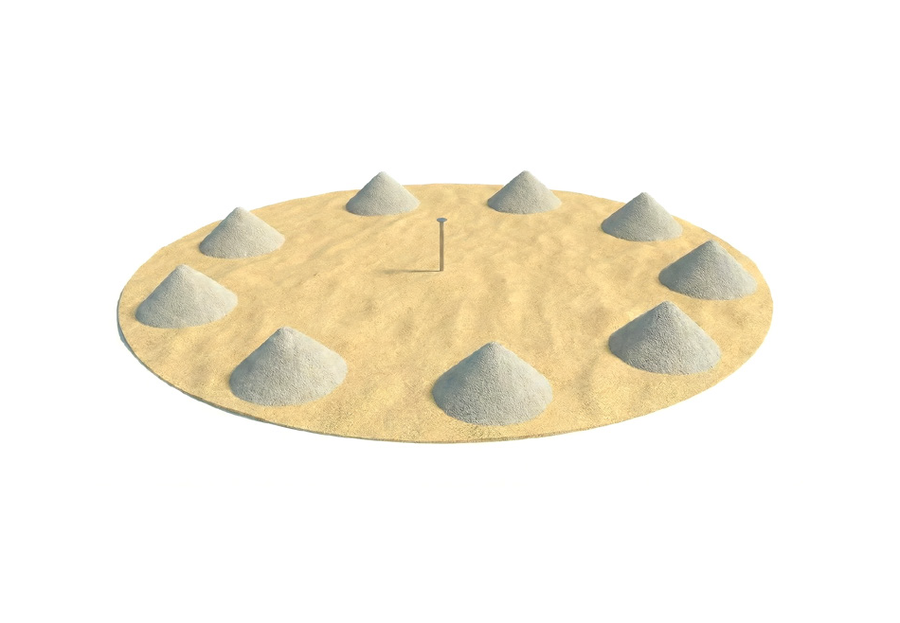
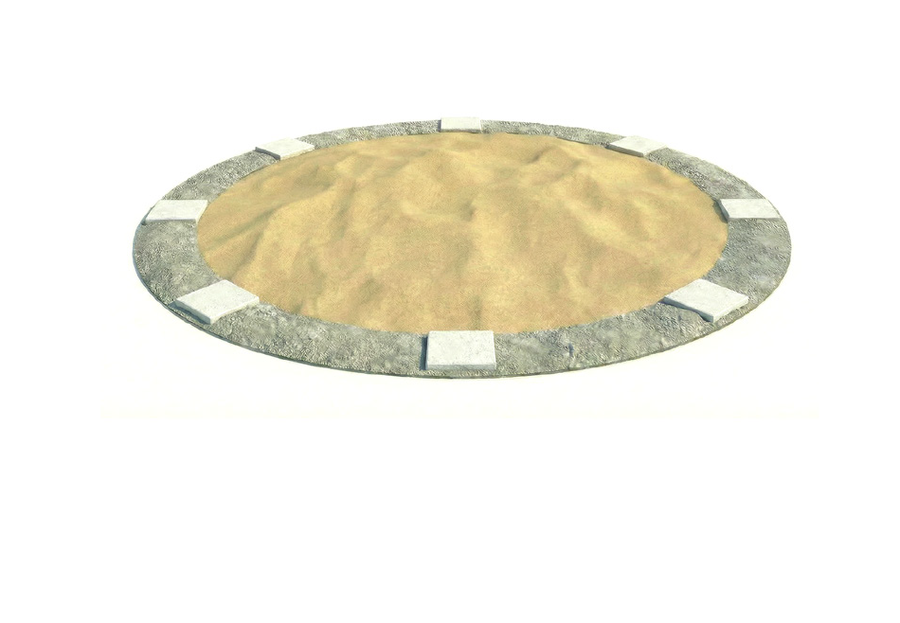
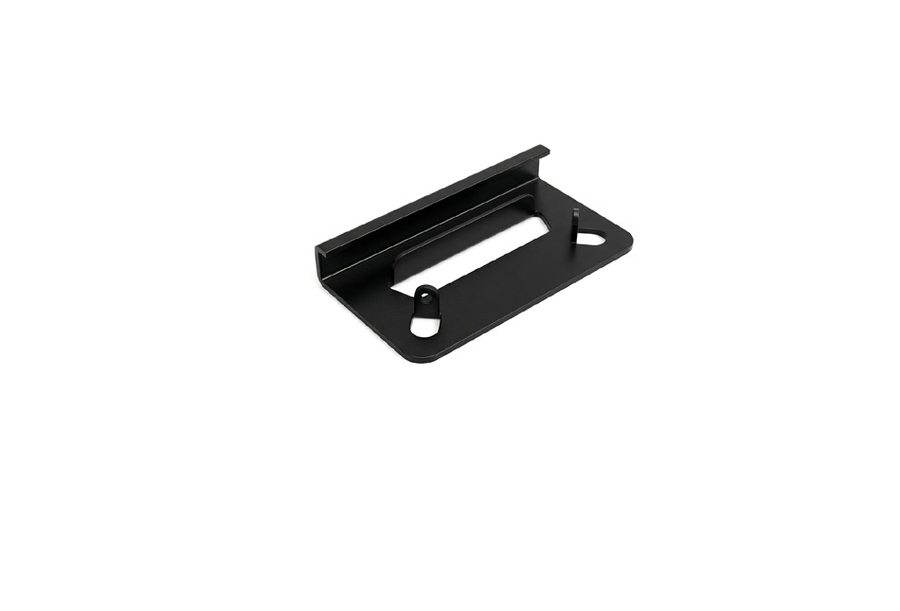
10. Bottom Plates
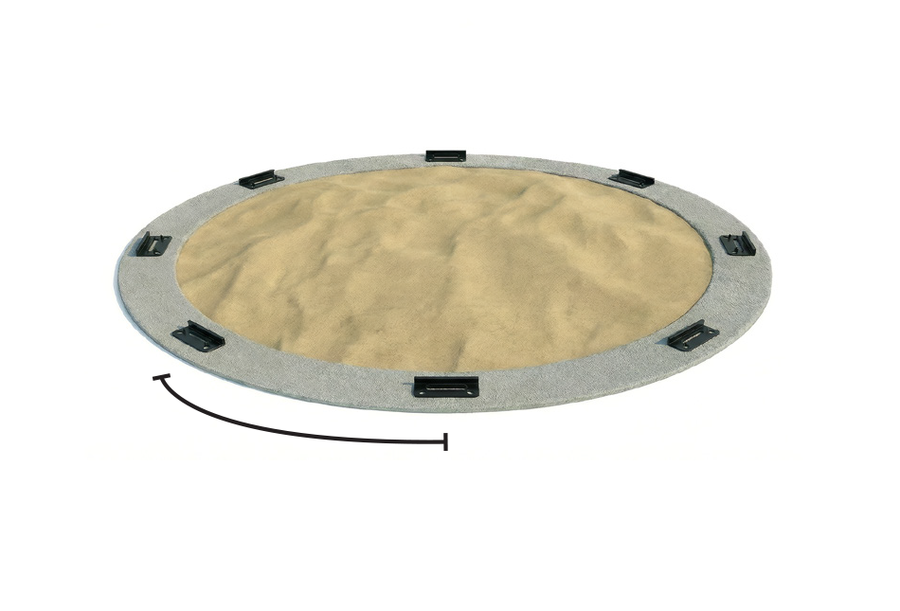
Evenly space the bottom plates around the perimeter.
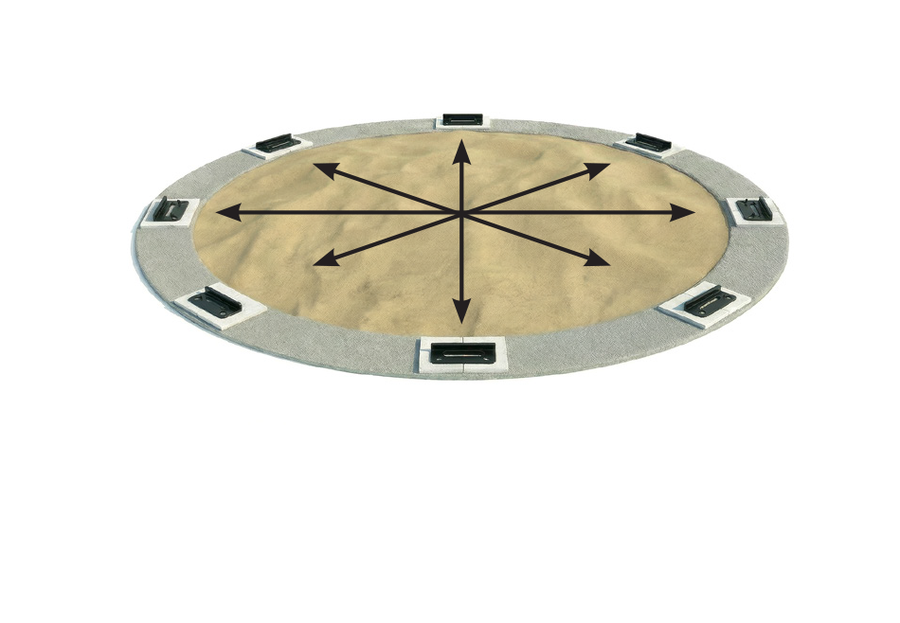
11. Roundness Check
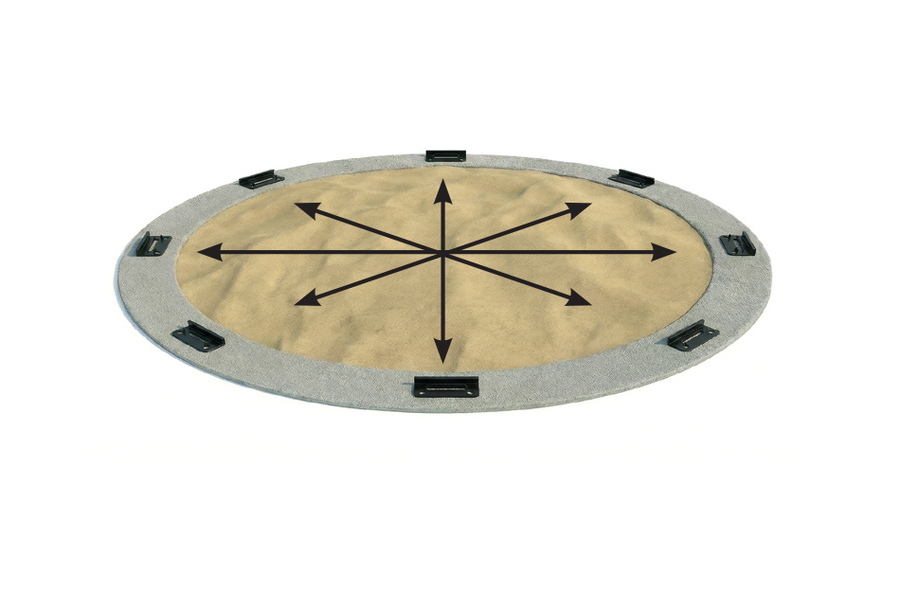
Measure the diameter in several locations to confirm a true circle.
12. Optical Level
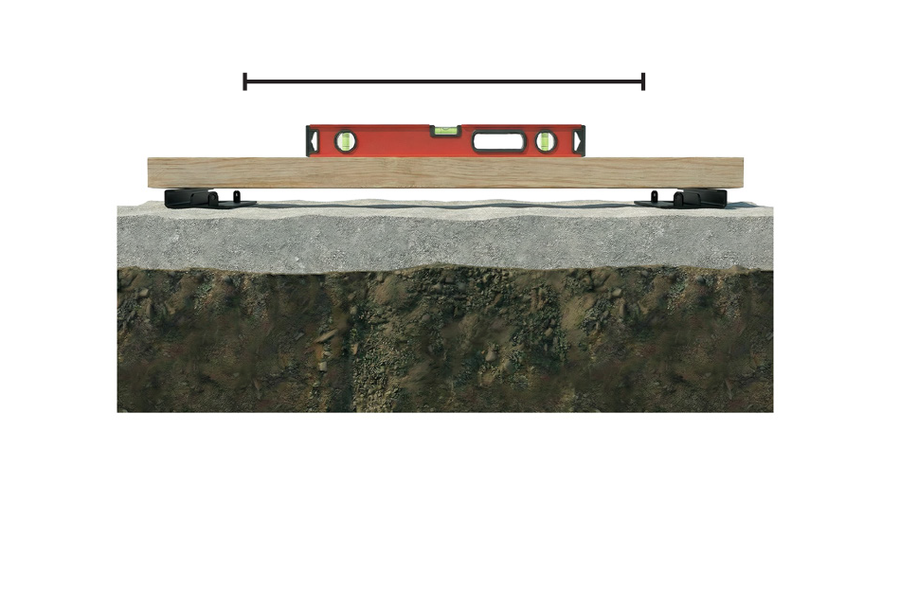
Verify the height of each bottom plate; all plates must be at the same height.
Patio Stone Installation (Optional)
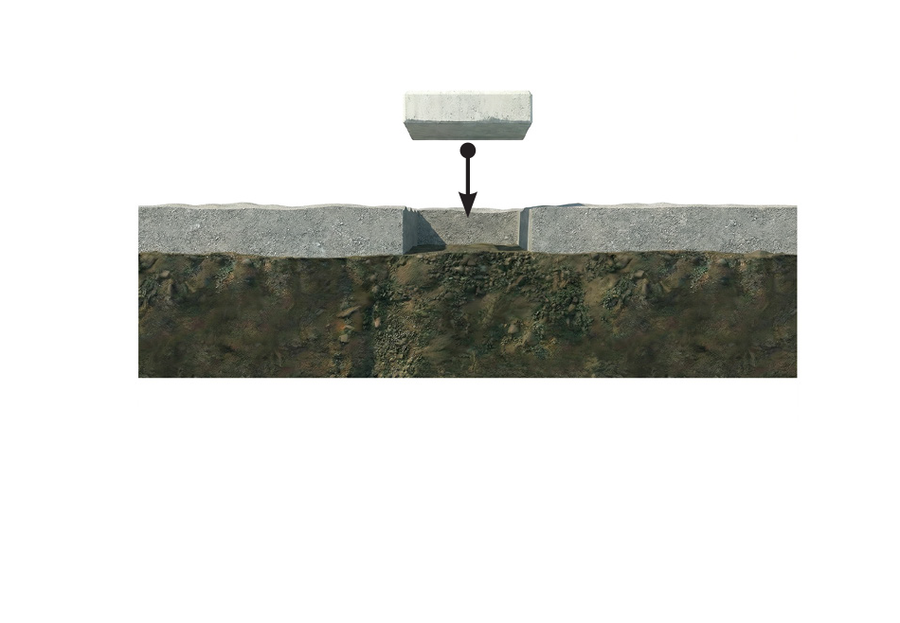
13. Place Stones
Replace each bottom plate with a patio stone.
14. Stone Level
Sink stones flush with the soil and ensure they are level with each other.
15. Plates Return
Place bottom plates back on the stones and recheck diameters.
Assembling the Pool Base
16. Plates Positioning
Confirm plates are fully seated and aligned correctly.
17. Rails Placement
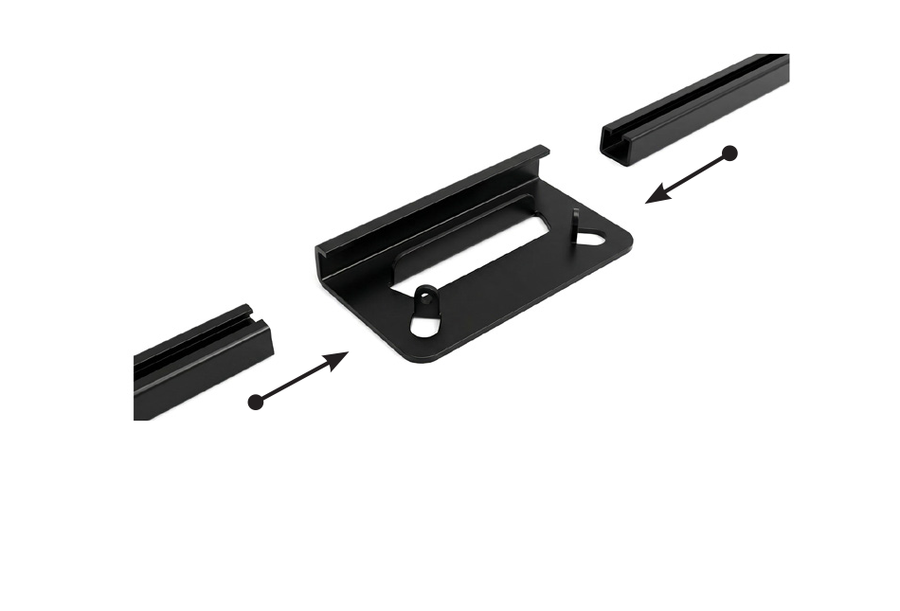
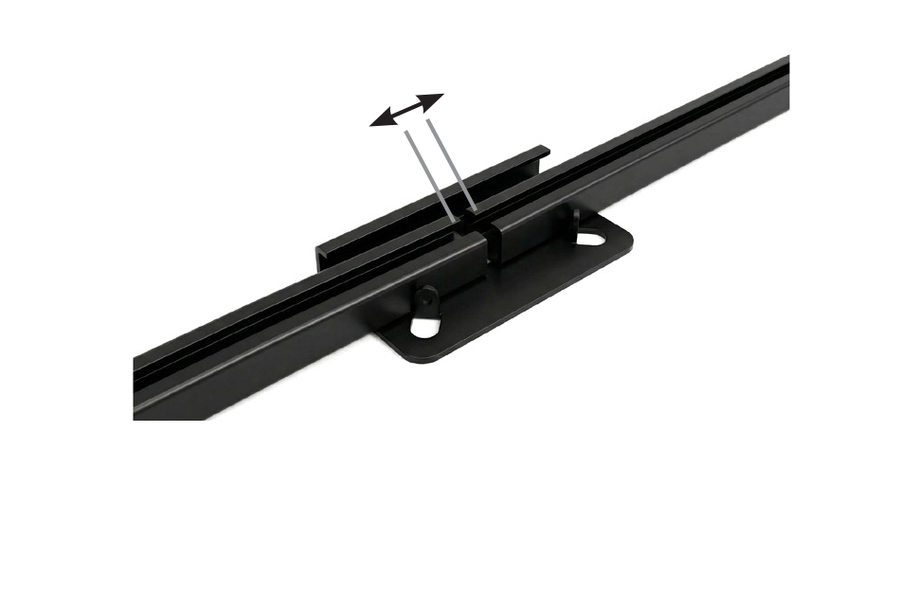
Insert each bottom rail into its corresponding bottom plate.
18. Rail Gap
Refer to the following product chart for the required gap.
Section 2
Assembling
The Pool Frame
Setting Up the Pool Wall
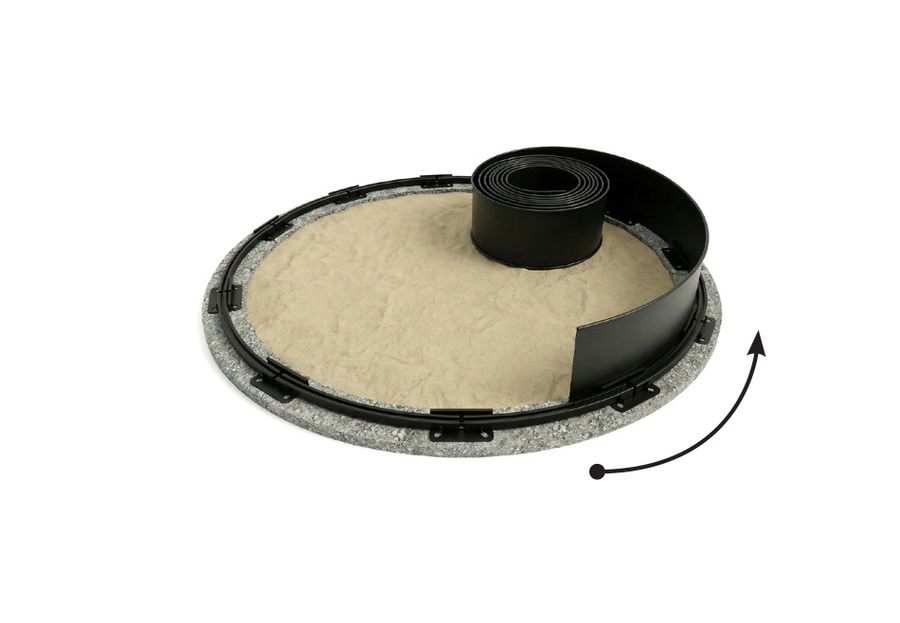
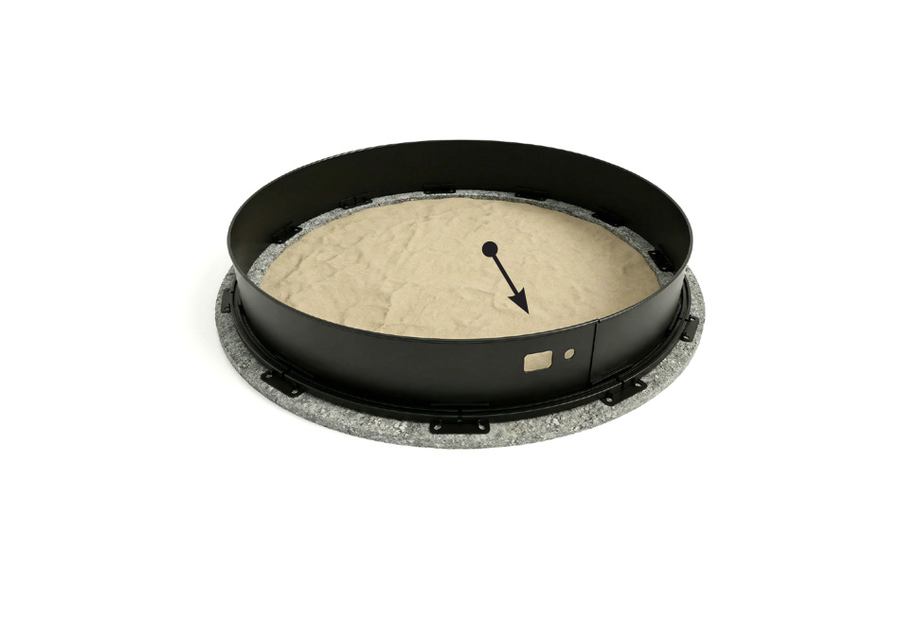
1. Uncoiling
Center the wall end on a bottom plate, then guide the wall into the bottom rails.
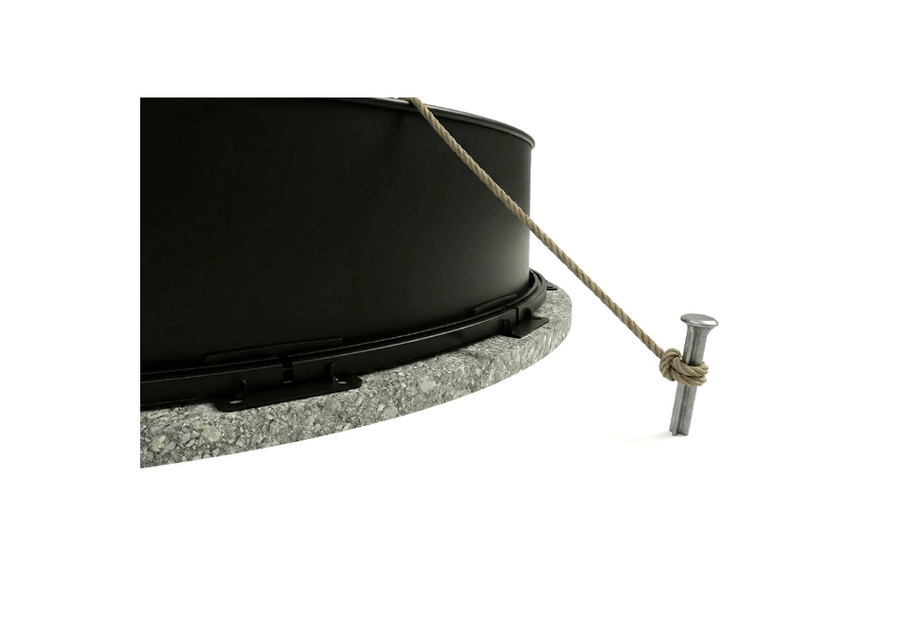
2. Temporary Support
Use rope and ground stakes to hold the wall upright during setup.
3. Skimmer Orientation
Note that the skimmer and return openings are placed at the last section.
Wall Alignment Scenarios
Scenario 1
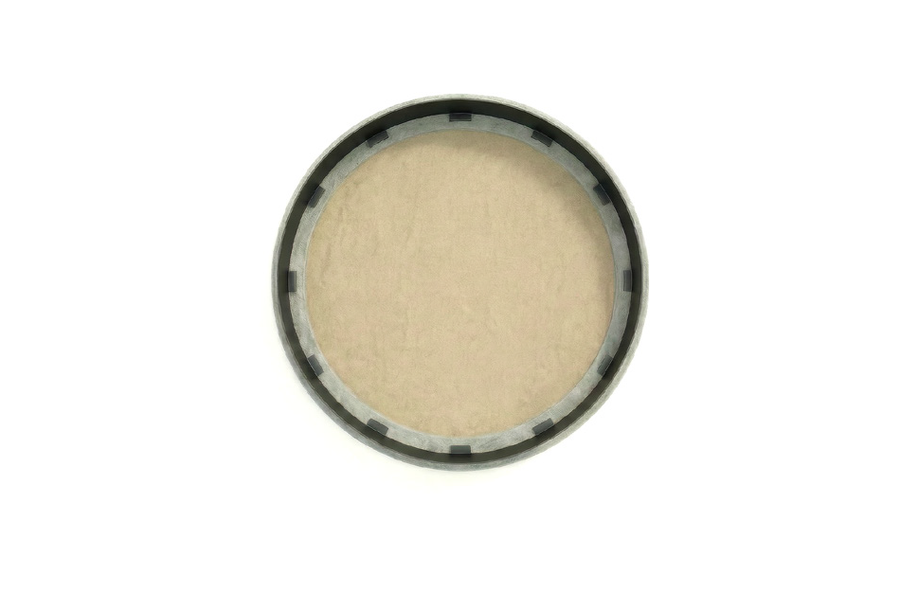
Wall fits correctly with even spacing around the circle.
Scenario 2
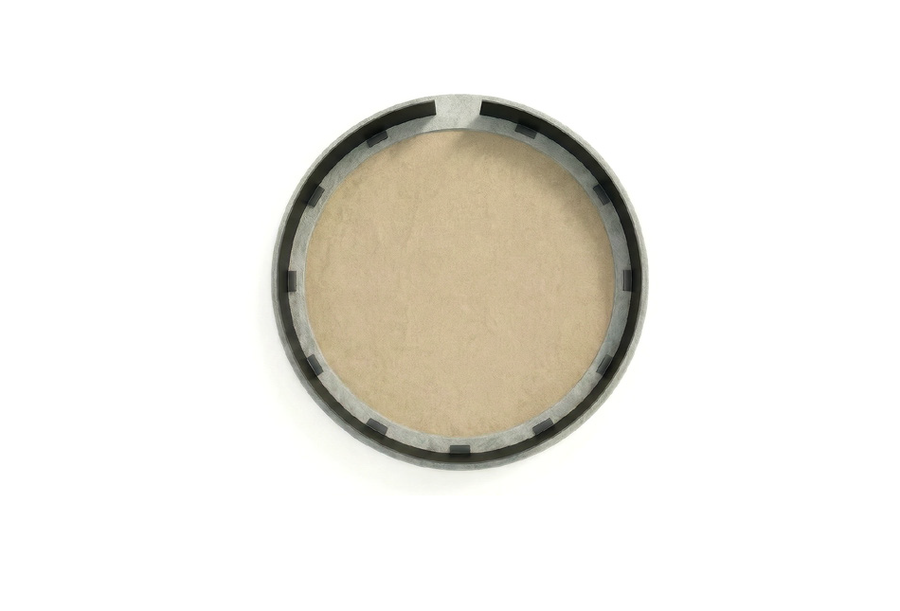
Wall appears short. Tap bottom plates inward to reduce rail gaps.
Scenario 3
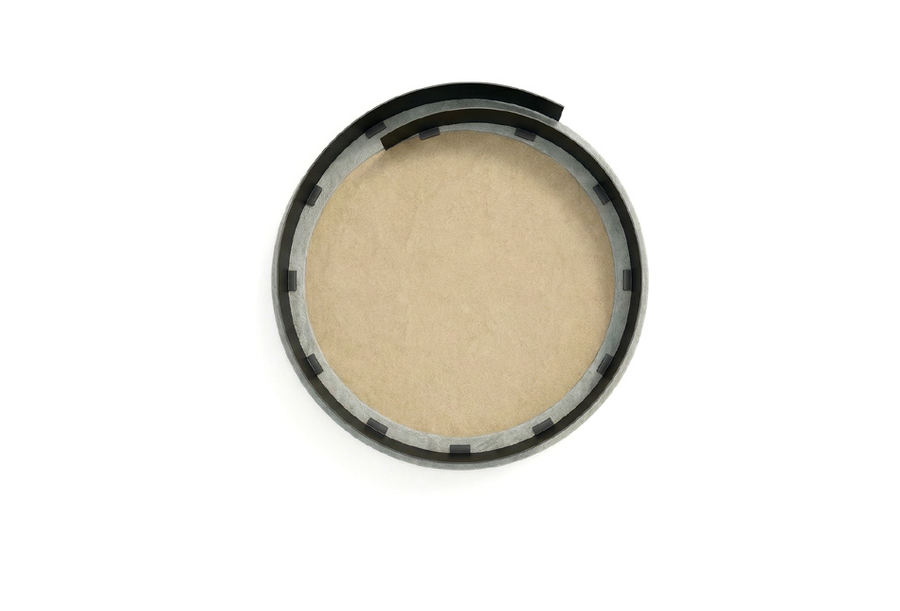
Wall appears long. Tap bottom plates outward to increase rail gaps.
Joining the Wall Seam
4. Fastening
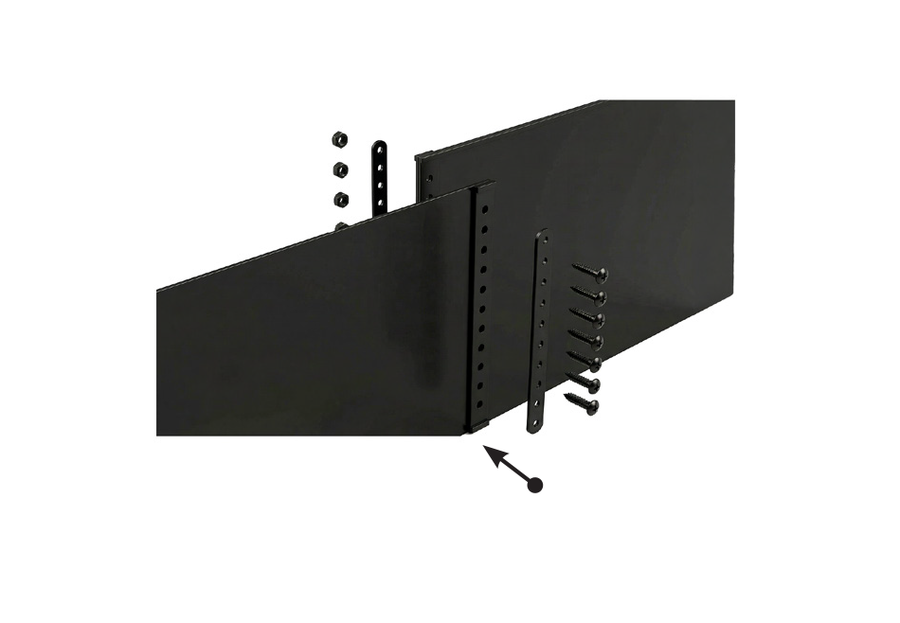
Overlap the steel wall ends and secure with bolts inside and nuts outside.
5. Taping
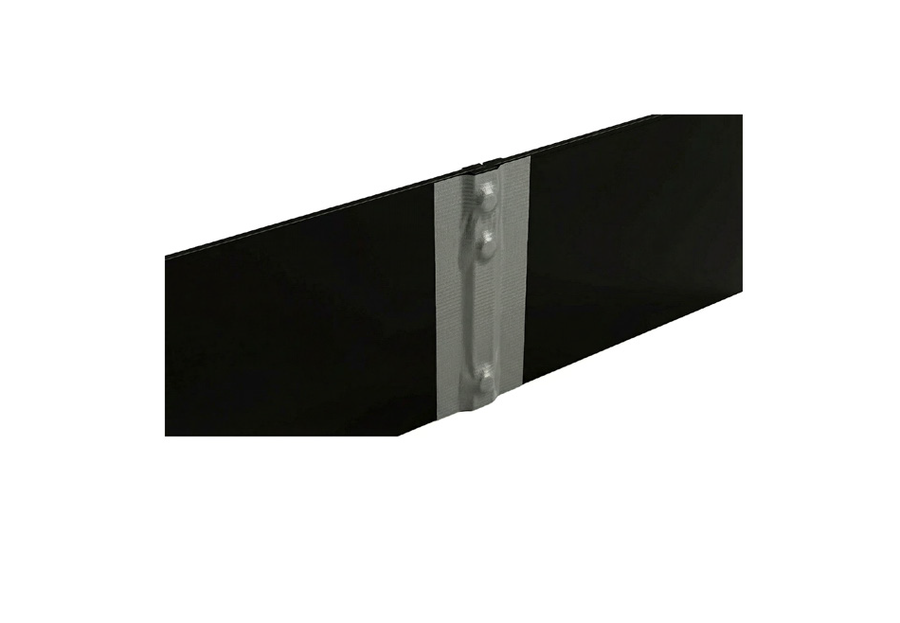
Cover the interior seam and bolt heads with 2" duct tape to protect the liner.
6. Slotted Tubes
Place slotted tubes along the wall and connect them evenly to hold the circle.
Installing Uprights & Top Plates
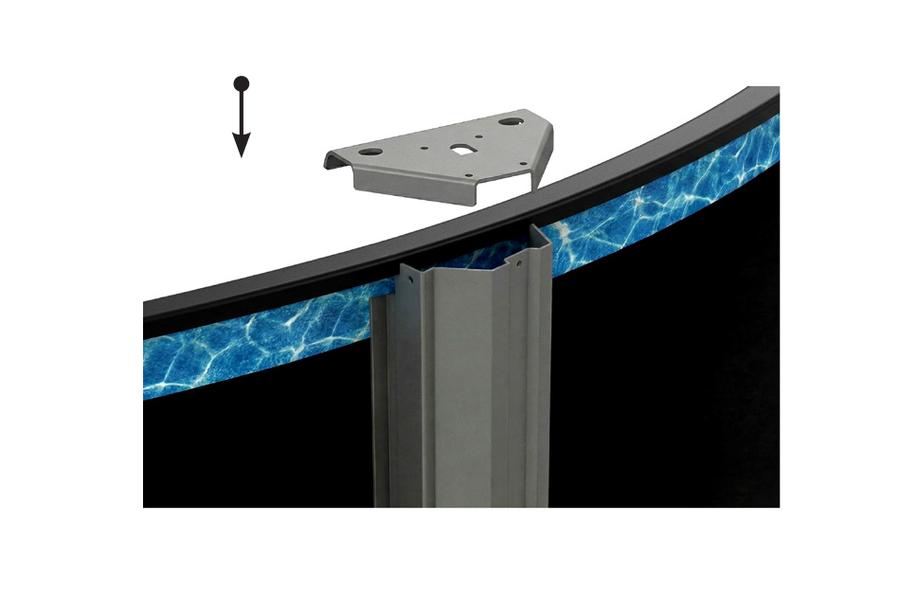
7. Uprights
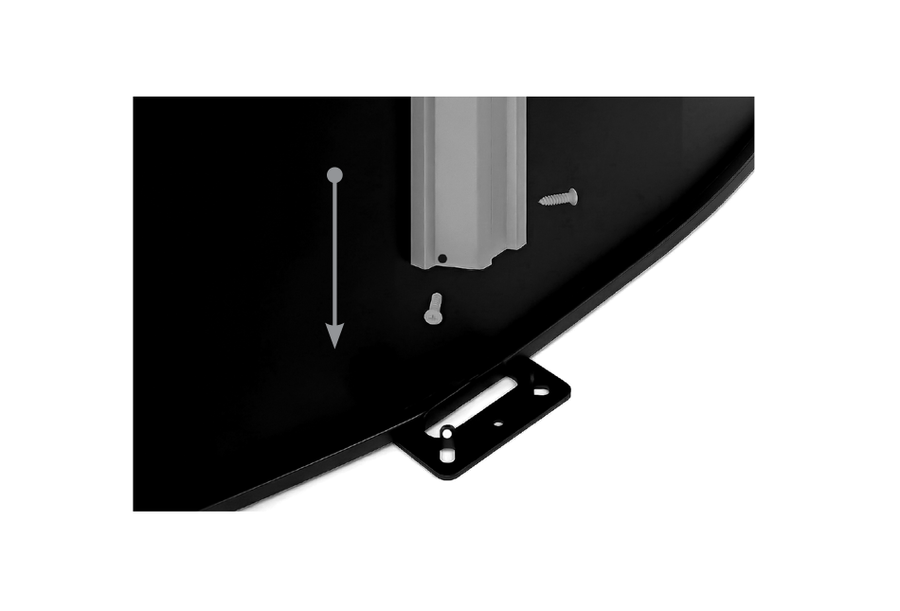
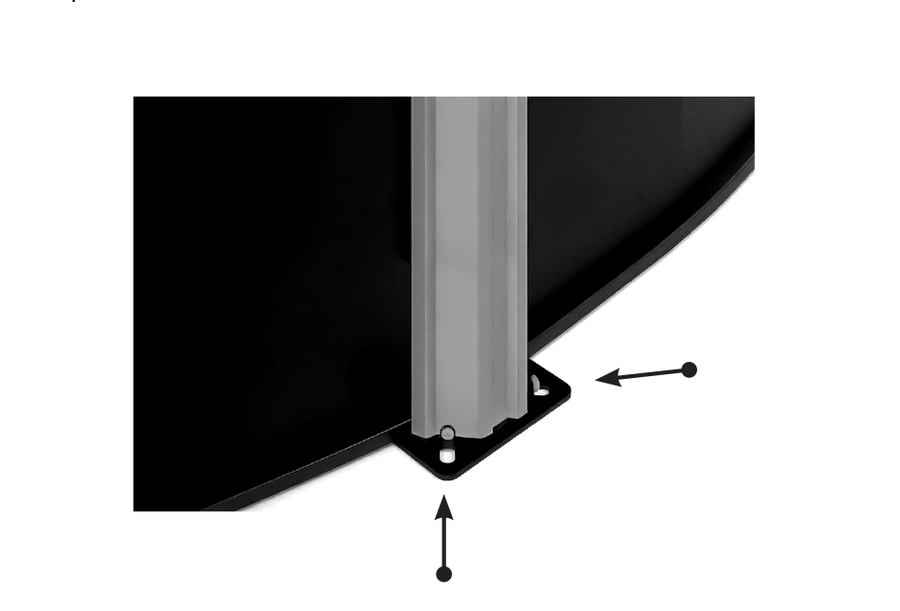
Align uprights with base plate tabs; tabs must sit inside columns.
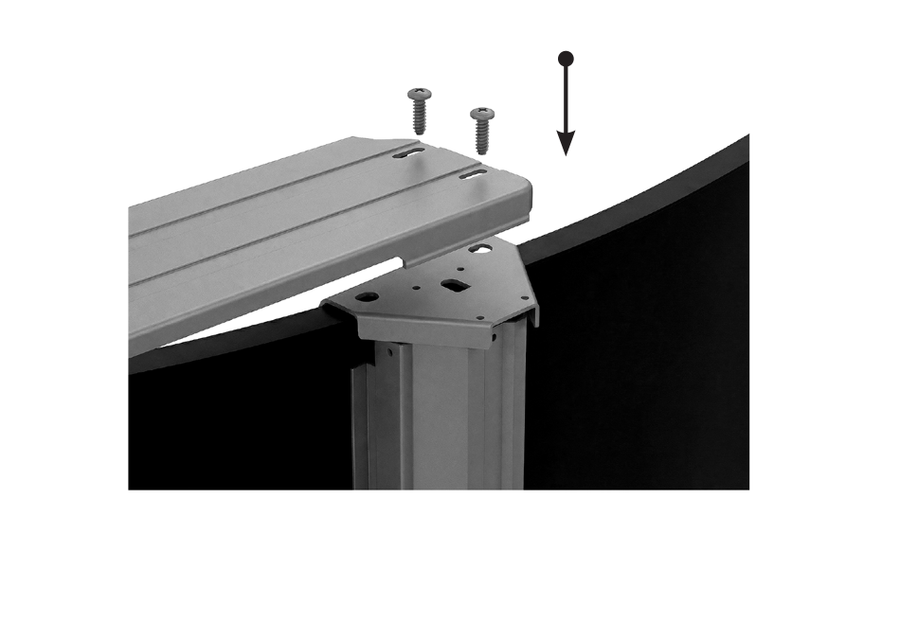
8. Screws
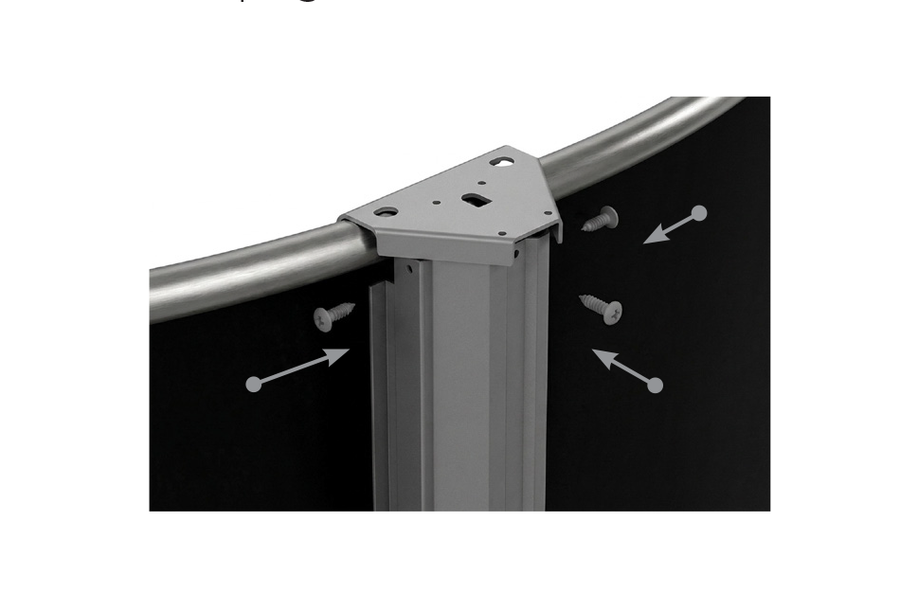
Secure uprights to bottom plates using the provided screws.
9. Top Plates
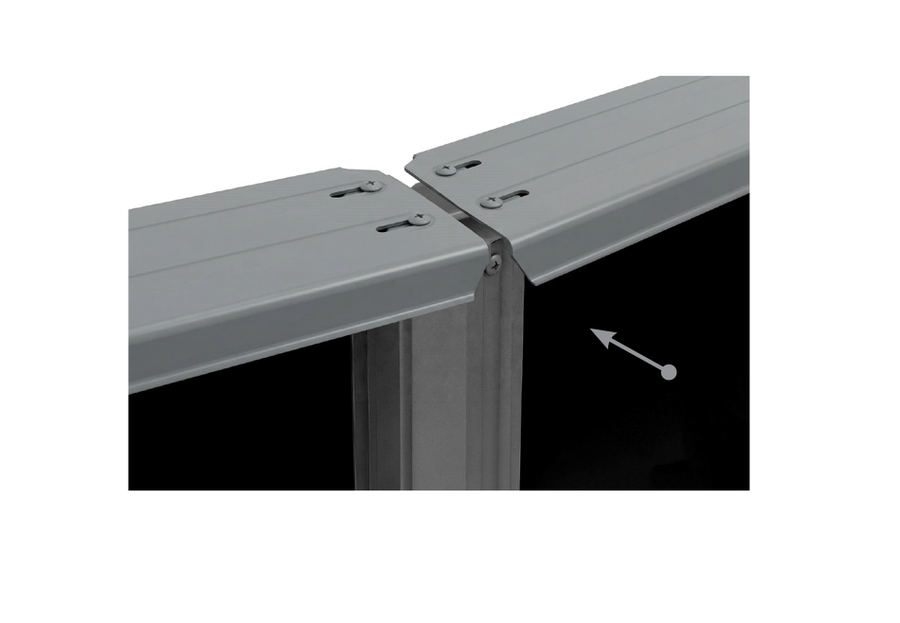
Position top plates over the wall and fasten to uprights.
Section 3
Installing
The Cove & Liner
Putting the Cove
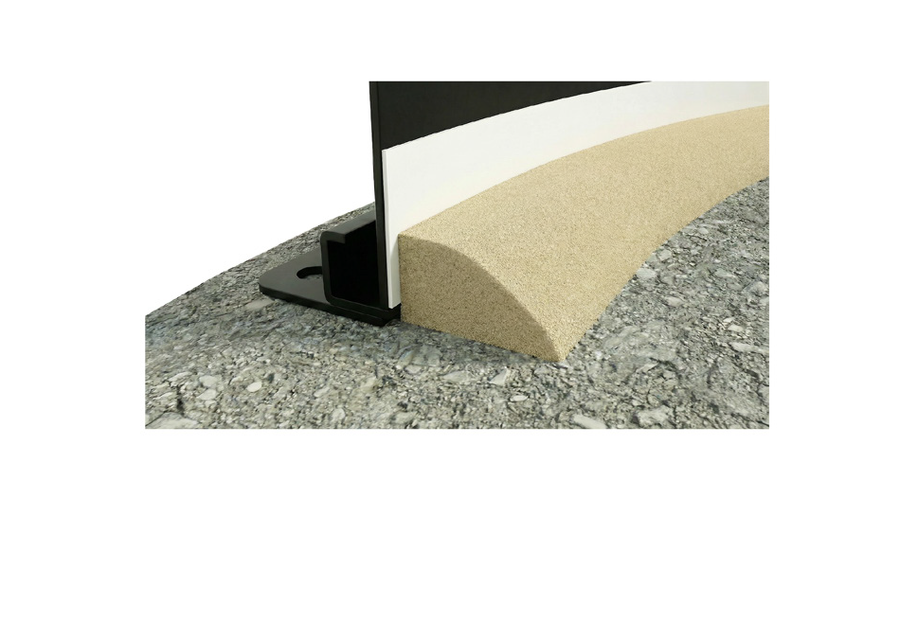
1. Foam Cove
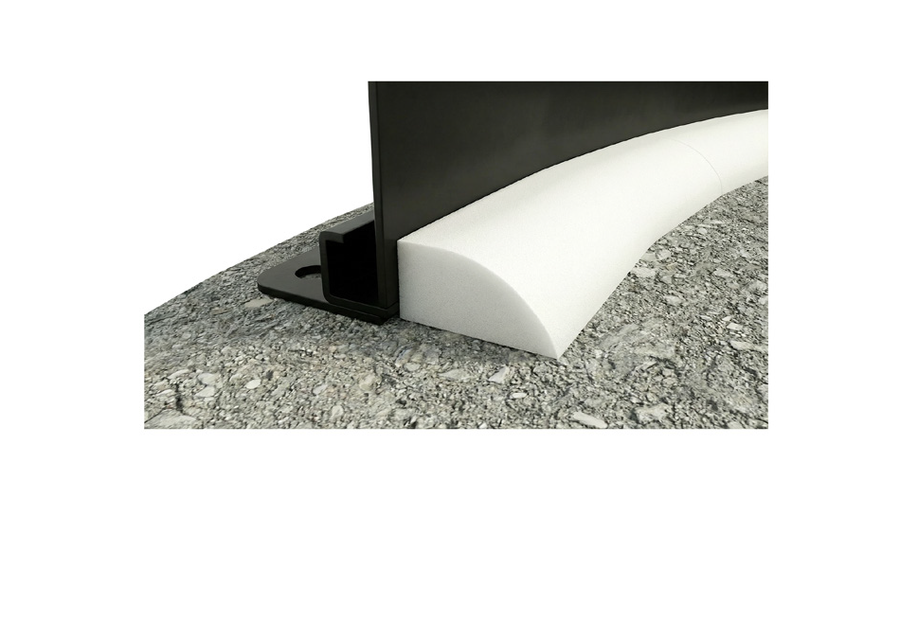
If using foam cove pieces, insert them into the bottom rail.
2. Sand Cove
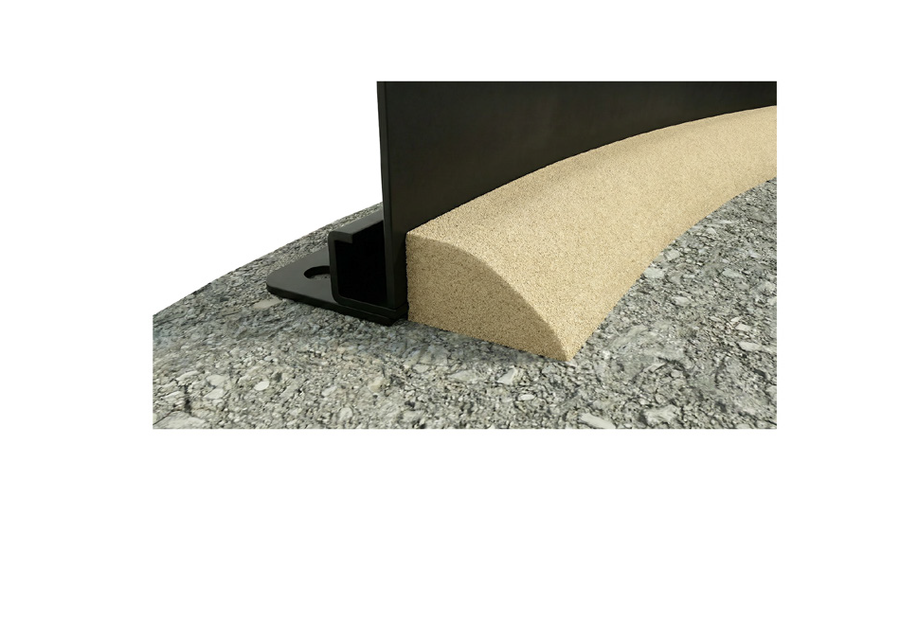
If using sand, form a cove against the wall (3 to 6 in high, 8 to 12 in wide).
3. Protection
If using sand cove, place plastic sheeting under the cove to protect the wall.
Liner Preparation
4. Warm the Liner
Unfold the liner in the center of the pool. Let it warm above 70°F.
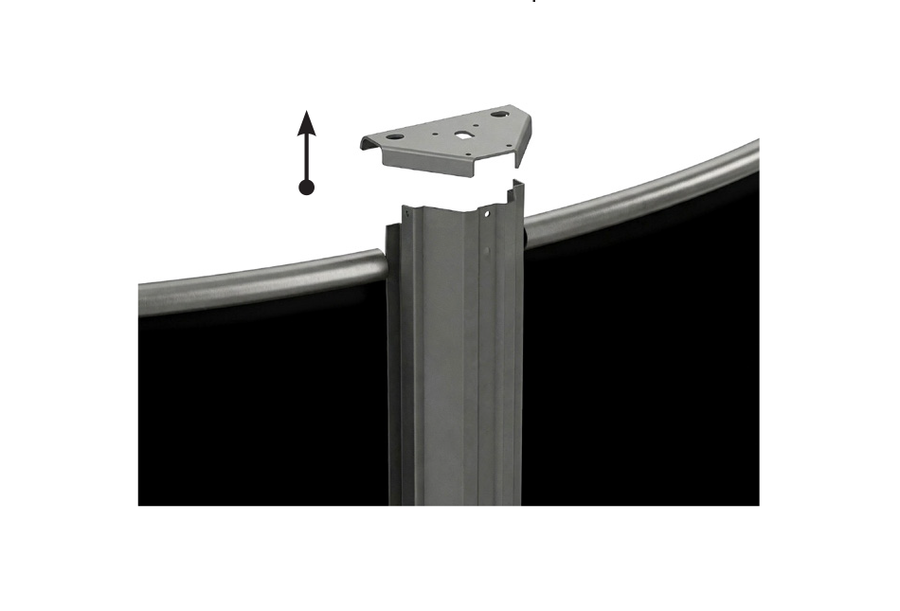
5. Remove Top Plates
Remove top plates from the wall one by one to secure the liner in place.
6. Place and Adjust Liner
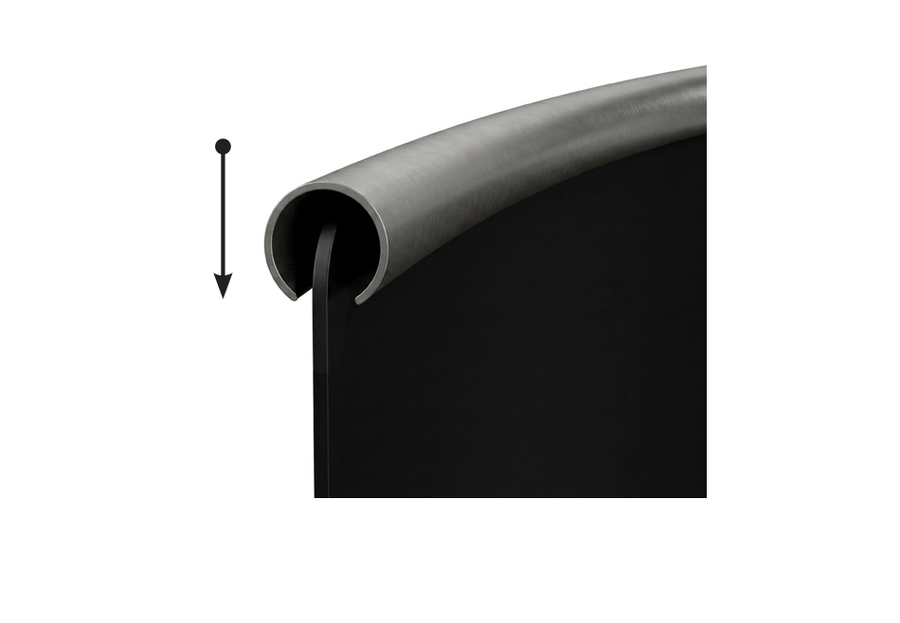
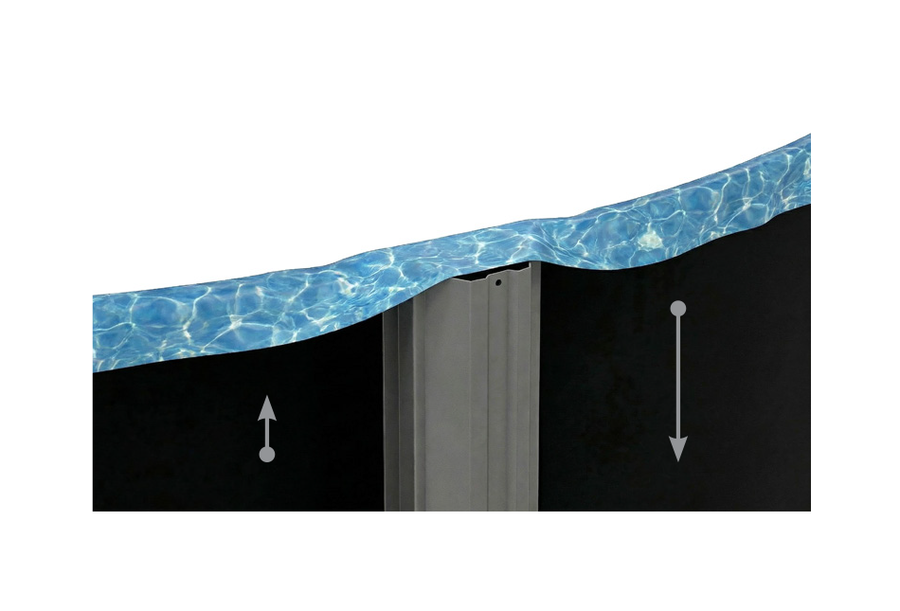
Temporarily rest the liner over the slotted tubes before securing it with the plastic coping. Adjust height if needed.
Liner Alignment
7. Floor Alignment
Smooth the liner across the base. Ensure the seams rest fully on the cove.
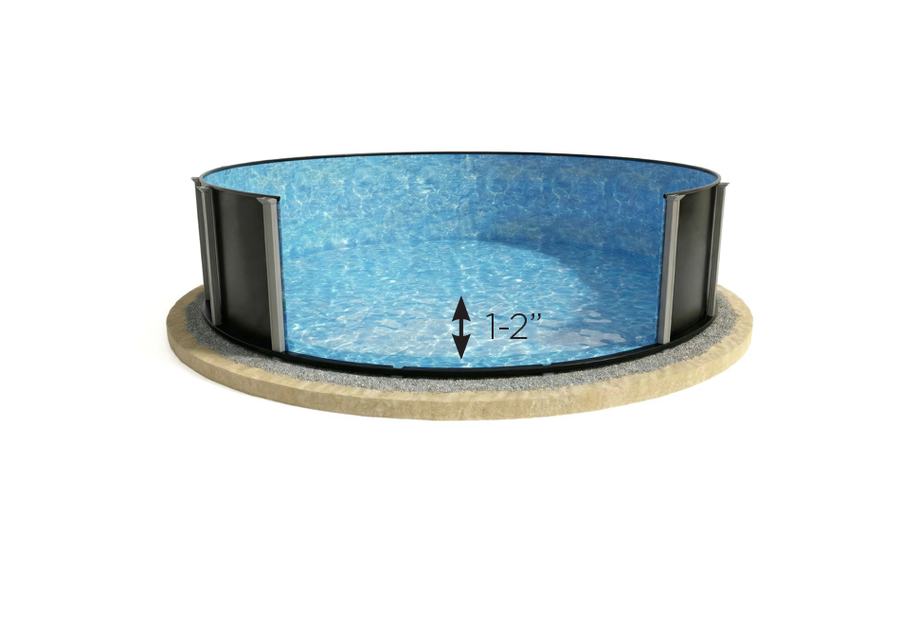
8. Initial Fill
Add 1 to 2 inches of water. Re-check level and roundness.
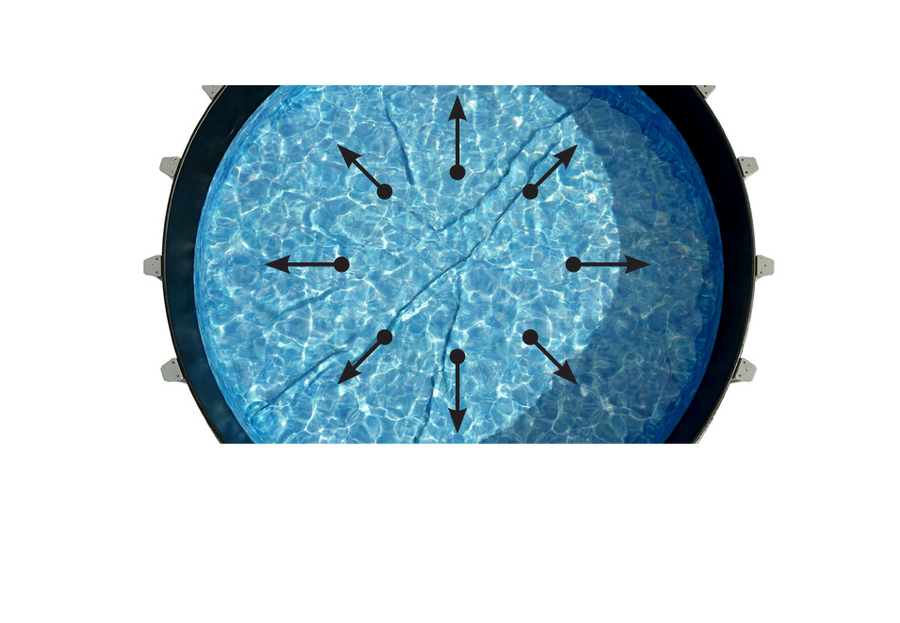
9. Remove Wrinkles
With shallow water, push wrinkles from center outward.
Securing & Filling
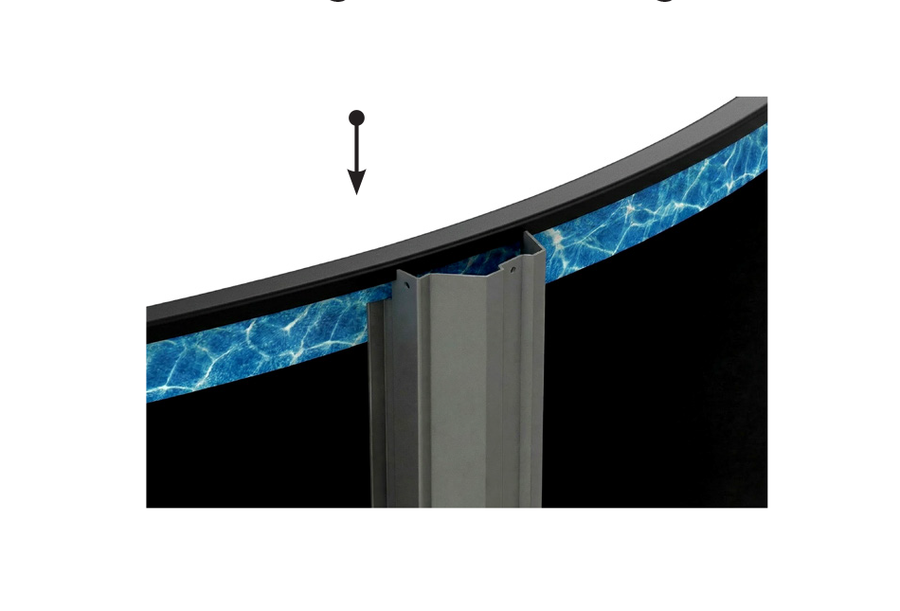
10. Install Plastic Coping
Secure the liner with the plastic coping after confirming the correct height.
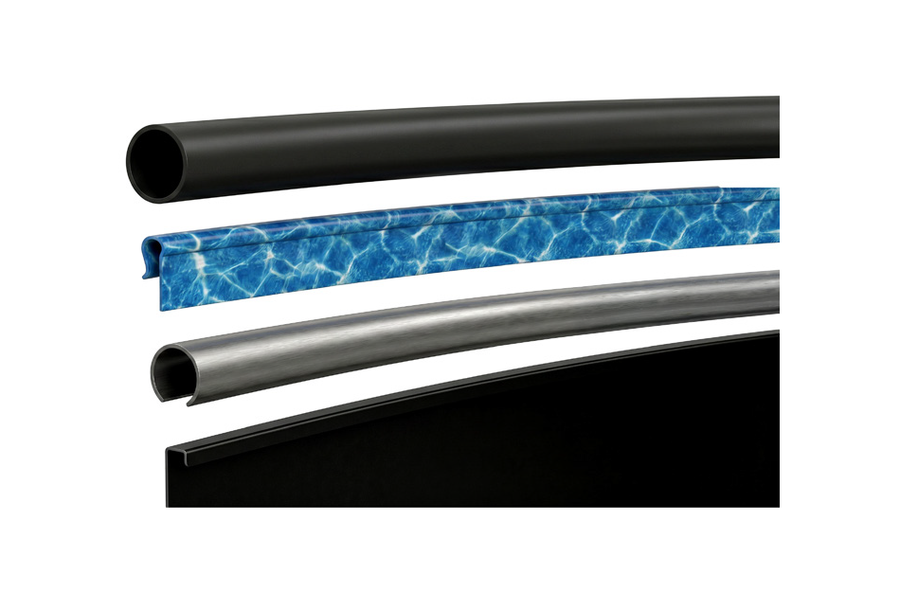
11. Correct Order
Confirm the order of installation: wall, slotted tube, liner, plastic coping.
12. Reinstall Top Plates
Reattach the top plates over the plastic coping to secure the assembly.
Installing Top Ledges
13. Mounting
Place top ledges between plates; leave screws loose until all are installed.
14. Perfect Circle
Push the pool wall inward at each upright to form a true circle.
15. Front Screw
Loosen the front screw connecting the top plate to the upright.
Installing the Ledge Covers
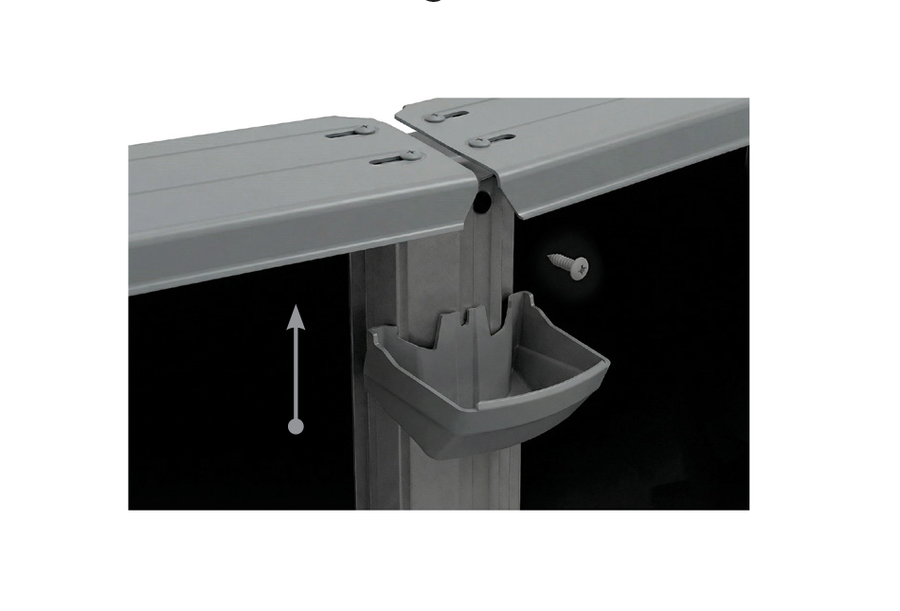
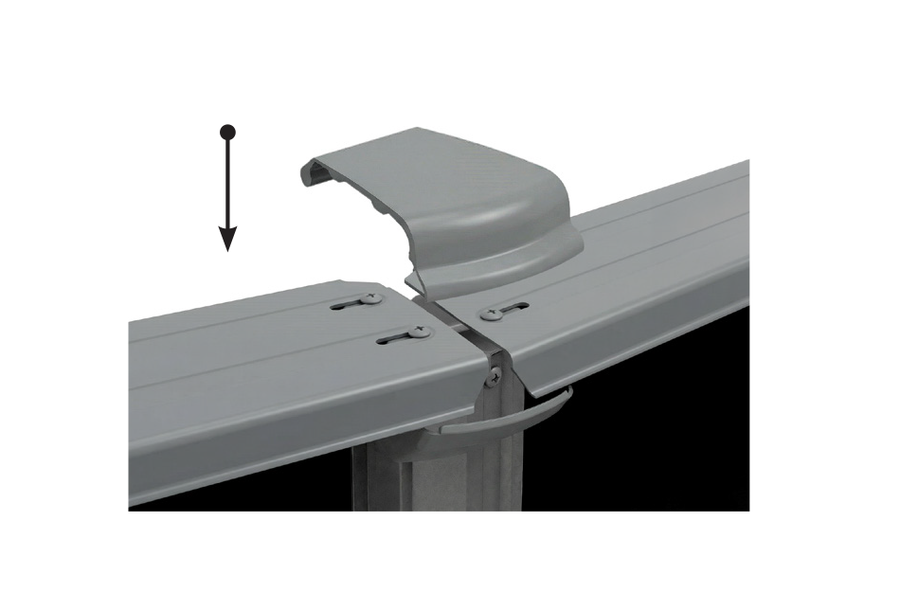
16. Bottom Ledge Cover
Slide bottom cover upward until it rests beneath the retaining screw.
17. Top Ledge Cover
Snap top cover so the front lip overlaps the bottom cover.
18. Final Frame Check
Confirm the frame is round, level, and fully seated in all rails and plates.
<div class="dynamic-checkout__content" id="dynamic-checkout-cart" data-shopify="dynamic-checkout-cart"> <shopify-accelerated-checkout-cart wallet-configs="[{"supports_subs":true,"supports_def_opts":false,"name":"shop_pay","wallet_params":{"shopId":26521534554,"merchantName":"AquaDoc","personalized":true}},{"supports_subs":false,"supports_def_opts":false,"name":"amazon_pay","wallet_params":{"checkoutLanguage":"en_US","ledgerCurrency":"USD","placement":"Cart","sandbox":false,"merchantId":"A2HNGNTX6KDCDX","productType":"PayAndShip","design":"C0002"}},{"supports_subs":true,"supports_def_opts":false,"name":"paypal","wallet_params":{"shopId":26521534554,"countryCode":"US","merchantName":"AquaDoc","phoneRequired":true,"companyRequired":false,"shippingType":"shipping","shopifyPaymentsEnabled":true,"hasManagedSellingPlanState":false,"requiresBillingAgreement":false,"gatewayType":"MANAGED","merchantId":"EBBVDE75UT2Z6","sdkUrl":"https://www.paypal.com/sdk/js?components=buttons\u0026commit=false\u0026currency=USD\u0026locale=en_US\u0026client-id=AbasDhzlU0HbpiStJiN1KRJ_cNJJ7xYBip7JJoMO0GQpLi8ePNgdbLXkC7_KMeyTg8tnAKW4WKrh9qmf\u0026merchant-id=EBBVDE75UT2Z6\u0026intent=authorize","serviceableCountryCodes":["US"]}}]" access-token="4e4619d038f47707f8ef9220956a11fe" buyer-country="US" buyer-locale="en" buyer-currency="USD" shop-id="26521534554" cart-id="74fe58d24fced072564dbd51a2480074" enabled-flags="["a1d1f9a1"]" > <div class="wallet-button-wrapper"> <ul class='wallet-cart-grid wallet-cart-grid--skeleton' role="list" data-shopify-buttoncontainer="true"> <li data-testid='grid-cell' class='wallet-cart-button-container'><div class='wallet-cart-button wallet-cart-button__skeleton' role='button' disabled aria-hidden='true'> </div></li><li data-testid='grid-cell' class='wallet-cart-button-container'><div class='wallet-cart-button wallet-cart-button__skeleton' role='button' disabled aria-hidden='true'> </div></li><li data-testid='grid-cell' class='wallet-cart-button-container'><div class='wallet-cart-button wallet-cart-button__skeleton' role='button' disabled aria-hidden='true'> </div></li> </ul> </div> </shopify-accelerated-checkout-cart> </div>